Creating and using surcharges
Setting up surcharges for price increases
Introduction: What are surcharges?
Surcharges are extra amounts or percentages that you add on top of the purchase price when selling products. For example: you buy roses for 1 euro each, but you want to make 60% profit. Then you set a surcharge of 60%, and the selling price automatically becomes 1.60 euro.
Why use surcharges?
You want to use surcharges because:
- You can automatically add profit margins to all products
- You don't have to manually calculate each price
- You can use different prices for different customers (for example retailers get 50% surcharge, end customers 100%)
- You can automatically pass on transport costs
- You can easily adjust prices for all products at once
- The system automatically calculates the correct selling price
How do you set up surcharges?
Setting up surcharges is done in three steps: first you create the surcharge itself (for example "60%"), then you put it in a surcharge group, and finally you link the surcharge group to a surcharge category that you can assign to customers.
Step 1: Create a surcharge
First you create the surcharge itself. This is the percentage or amount you want to add.
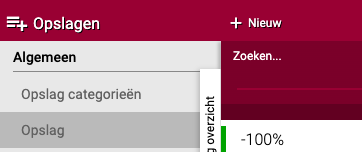
Go to the surcharges menu
- Go to "Sales" (or the menu where surcharges are located)
- Click on "Surcharges"
- Click on "+New"
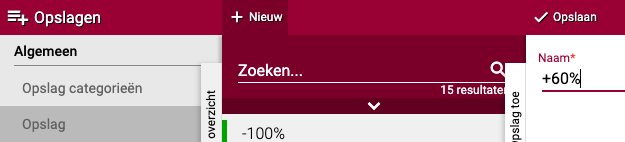
Give the surcharge a name
- Give the surcharge a recognisable name
- It is useful to link the name to the percentage or amount
- Example: If you want 60% surcharge, name it "60%"
- Click "Save"

Add surcharge rules
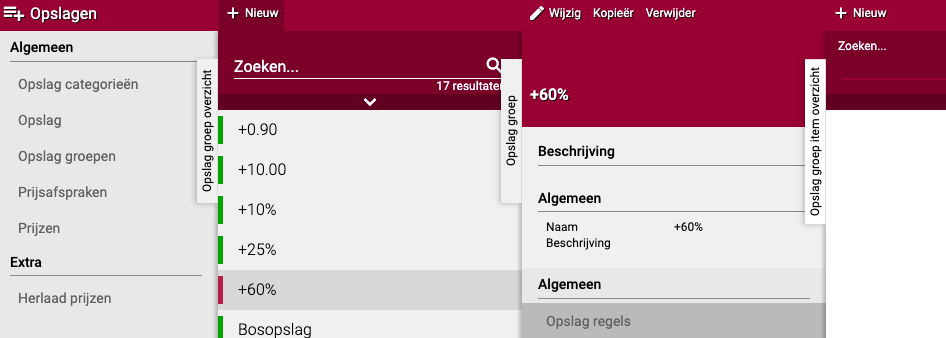
- The surcharge now appears in the list
- Click on the surcharge you just created
- Click the "Surcharges" button
- You now see three options to choose from
Three types of surcharges
You can choose from three different ways to calculate a surcharge:
Option 1: Addition (fixed amount) Use this if you want to add a fixed amount, for example always 5 euros extra.
- Click on "Addition"
- Order: Enter a number (for example "1")
- This determines the order in which things are calculated if you have multiple surcharges
- 1 = first, 2 = second, and so on
- Currency: Choose the currency (usually euro)
- Amount: Enter the fixed amount you want to add (for example "5.00" for 5 euros)
- Click "Save"
Option 2: Container (packaging costs) Use this if you want to calculate costs for containers (crates, boxes, pallets).
- Click on "+Container"
- You can calculate surcharges on:
- The price of the container
- The rental price of the container
- The deposit of the container
- A combination of these three
- This is useful if you want to pass on container costs to customers
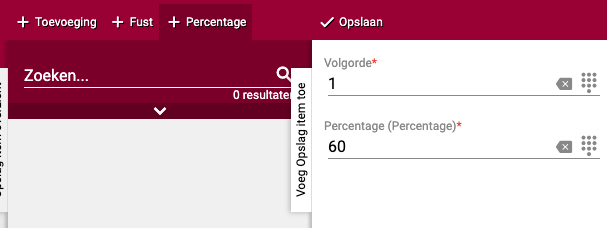
Option 3: Percentage (most commonly used) Use this if you want to add a percentage, for example 60% or 100%.
- Click on "Percentage"
- Order: Enter a number (for example "1")
- Percentage: Enter the percentage you want to add (for example "60" for 60%)
- Click "Save"
Example: Setting up 60% surcharge
- Click on "Percentage"
- Enter "1" for order
- Enter "60" for percentage
- Click "Save"
Done! The surcharge is now created. But you can't use it yet. First you need to put it in a surcharge group.
Step 2: Create a surcharge group
Now you are going to put the surcharge you made into a group. This may seem redundant, but it makes the system very flexible. For example, you can put multiple surcharges in one group.
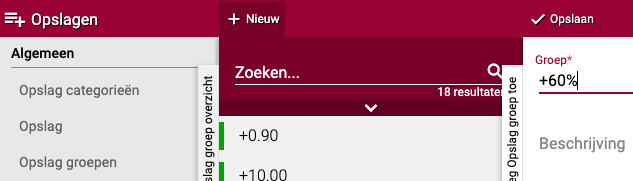
Create surcharge group
- Go to "Surcharge groups"
- Click on "+New"
Choose a name
- Give the group a name
- For beginners: Use the same name as the surcharge (for example "60%")
- For advanced users: Use a general name (for example "Flowers surcharge", "Plants surcharge", "Transport costs")
- Description (optional): You can add a description, but this is not required
- Click "Save"
Add surcharge rules
- The surcharge group now appears in the list
- Click on the surcharge group you just created
- Click the "General" tab
- Click on "Surcharge rules"
- Click "New"
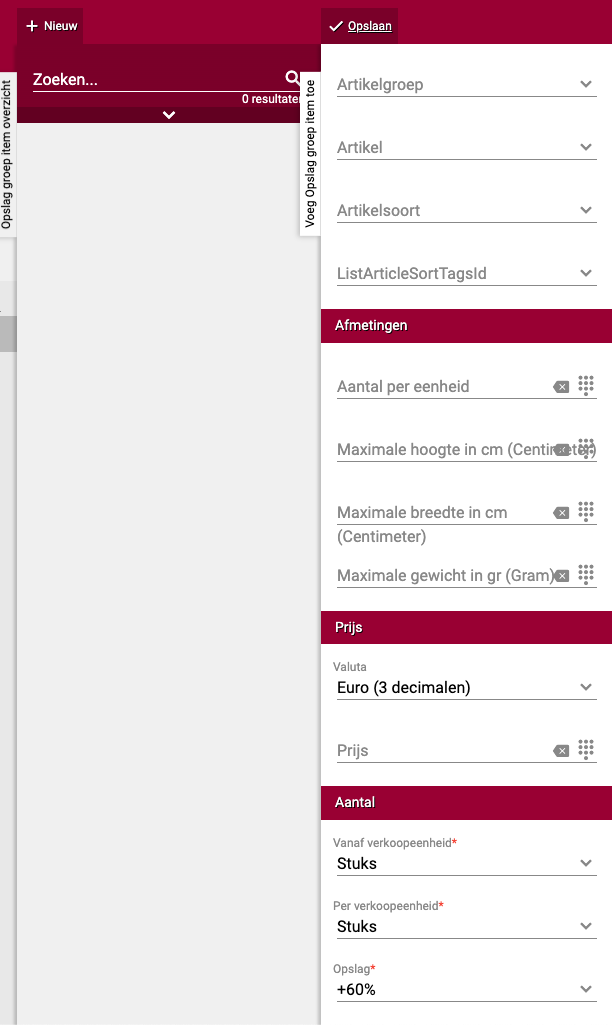
Configure surcharge rule Now you will specify which products this surcharge applies to.
Filters (optional): You can set filters if the surcharge should only apply to certain products:
- Article group: For example only for flowers, or only for plants
- Quantity per unit: For example only for products sold per piece
- Maximum height: For example only for products up to 50cm
- Weight and width: For specific dimensions
For this example: Leave all filters empty if you want to use the surcharge for all products.
Set quantity (required): This field has a red star, so you must fill this in.
- From sales unit: Select "pieces" (or the unit you use)
- This means the surcharge applies per piece, per bunch, or per container
- Example: If you want 60% surcharge per piece, select "pieces"
Select surcharge:
- Choose the surcharge you created in step 1 (for example "60%")
- Click "Save"
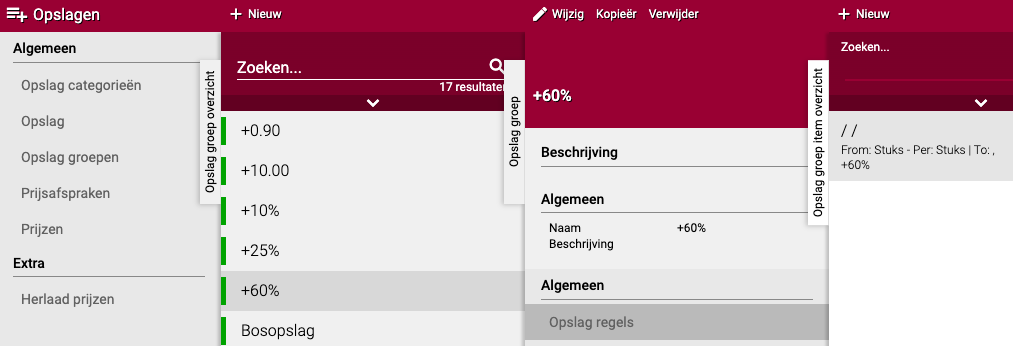
Done! You now see the surcharge rule in the overview.
Add multiple rules (optional): You can add multiple surcharge rules for different situations. For example:
- Rule 1: 60% for regular flowers
- Rule 2: 100% for exclusive roses
- Rule 3: 5 euros fixed amount for transport costs
Click "+New" each time to add a new rule.
Step 3: Create a surcharge category
Now you are going to put the surcharge group in a category. You can then assign this category to customers.
Create surcharge category
- Go to "Surcharge categories"
- Click on "+New"
Configure category
- Name: Give the category a name
- For beginners: Use the same name as the surcharge group (for example "60%")
- For advanced users: Use general names like "Sales surcharge", "Transport surcharge", "Discount surcharge"
- Surcharge group: Choose the surcharge group you created in step 2 (for example "60%")
- You can add multiple surcharge groups, but usually one is enough
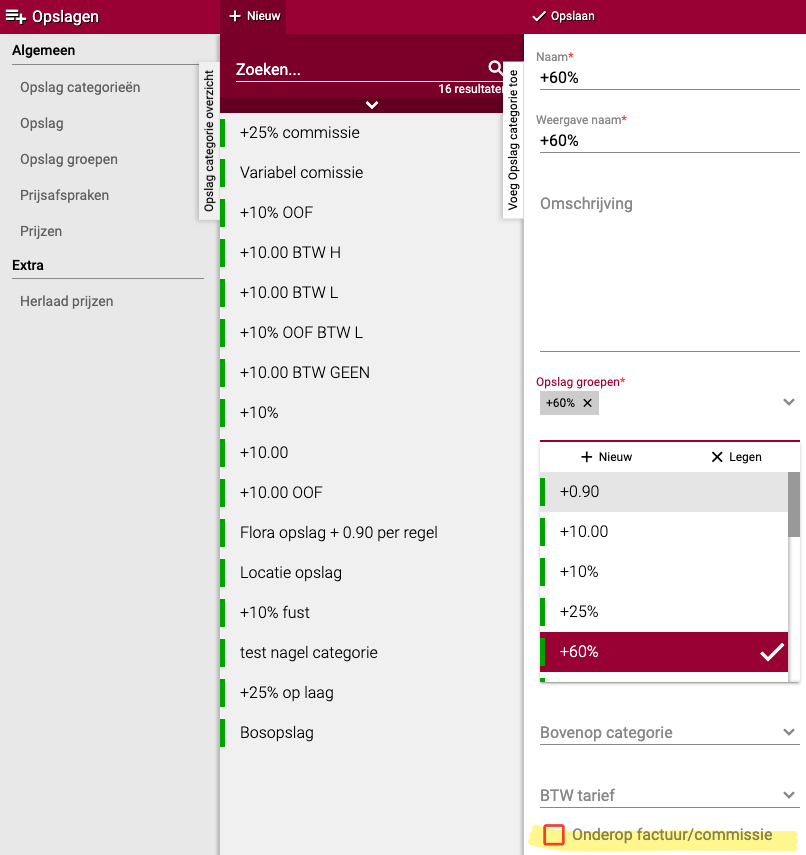
Set invoice visibility There is a red button with the text "At bottom of invoice/commission". This determines whether the surcharge is visible on the invoice.
Option A: Unchecked (default)
- The surcharge is not shown on the invoice as a separate line
- The customer only sees the final price per product
- Example: Product costs 1 euro purchase + 60% surcharge = customer sees 1.60 euros
Option B: Checked
- The surcharge is shown on the invoice as a separate line
- At the bottom of the invoice it says for example: "60% surcharge: 0.60 euros"
- The customer sees exactly how much surcharge has been added
Advice: Usually leave this unchecked, unless you want to be transparent about your margins.
Save
- Click "Save" at the top
- The surcharge category is now created
- You can now assign it to customers
You assign the surcharge category to a debtor via Organisation → Debtors → [Customer] → Surcharge category. See also: Creating and setting up a new customer (debtor)
Step 4: Reload surcharges (only for price calculation in stock)
If you have set surcharges to be calculated in the price, you must first reload them before they become active.
Perform reload
- Go to the "Extra" heading
- You will see options for reloading there

When to reload?
- Check the top checkbox to activate new surcharges
- Check to apply changes to existing surcharges
- This ensures all prices are recalculated with the new surcharges
Note: This is only needed if surcharges are processed in the stock price, not if they are only applied at invoicing.
Step 5: Set up rounding (optional)
You can have Easyflor round to specific amounts, for example always ending in 9 cents.
Why round?
- Prices look neater
- Psychological effect: 1.99 euros feels cheaper than 2.00 euros
- Consistent prices across your entire range
Configure rounding
- Go to the rounding settings
- You will see options to set decimals
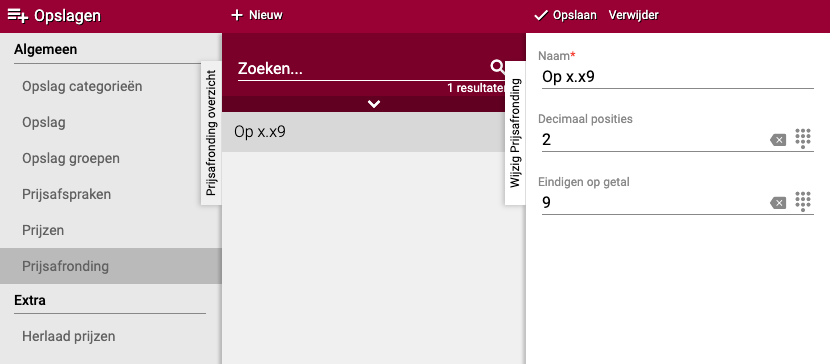
Example from the screenshot:
- Round to 2 decimals
- Always ending in 9 cents
- Possible prices: 0.09 - 0.19 - 0.29 - 0.39 and so on
- The next amount is used
Set your own rounding: You can fill in these fields freely as you wish. For example:
- Round to 5 cents: 0.05 - 0.10 - 0.15 - 0.20
- Round to whole euros: 1.00 - 2.00 - 3.00
- Round to 95 cents: 0.95 - 1.95 - 2.95
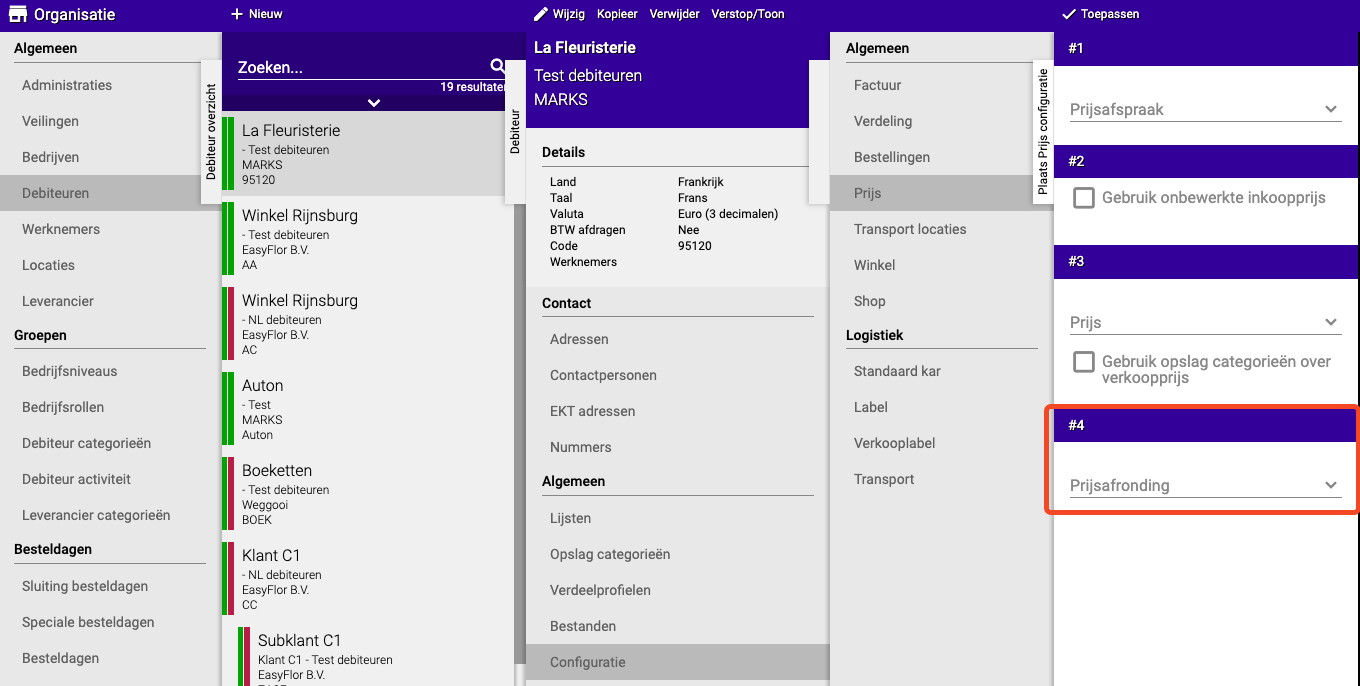
Where to set this? Rounding must be set per customer:
- Go to "Organisation" → "Debtors"
- Select the customer
- Go to "Price configuration"
- Set the rounding here
Practical examples
Example 1: 60% surcharge for retailer
- Situation: You sell to a florist who wants 60% surcharge
- Action: Create surcharge "60%" → surcharge group "Retailer surcharge" → surcharge category "Retailer" → assign to customer
- Result: All products automatically get 60% surcharge
Example 2: Different surcharges per product group
- Situation: Flowers 50% surcharge, plants 70% surcharge
- Action: Create two surcharges, one surcharge group with two rules filtered by article group, one category → assign to customer
- Result: Flowers get 50%, plants get 70%
Example 3: Fixed transport costs
- Situation: You want 10 euros transport costs per order
- Action: Create surcharge "Transport" with addition 10 euros, check "At bottom of invoice" → assign to customers
- Result: Every order gets 10 euros transport costs, visible on invoice
Example 4: Combination of percentage and fixed amount
- Situation: 60% surcharge + 5 euros administration costs
- Action: Create two surcharges with order 1 and 2, one group with two rules → assign to customer
- Result: First 60% is calculated, then 5 euros is added
Important tips
Tip 1: Start simple
- Start with one simple percentage surcharge
- If that works, you can add more complex rules
- Don't set up everything at once
Tip 2: Use logical names
- Give surcharges clear names like "60%" or "Retail surcharge"
- This prevents confusion later
- Especially useful if you have many different surcharges
Tip 3: Always test
- Place a test order to check if the prices are correct
- Check if the correct surcharge is applied
- Check the invoice to see if everything looks right
Tip 4: Order matters
- If you have multiple surcharges, the order determines the end result
- Example: 100 euros + 10% + 5 euros = ?
- Order 1-2: (100 + 10%) + 5 = 110 + 5 = 115 euros
- Order 2-1: (100 + 5) + 10% = 105 + 10.50 = 115.50 euros
- So pay close attention to the order!
Tip 5: Transparency with customers
- Discuss with customers whether they want to see surcharges on the invoice
- Some customers only want to see the final price
- Others want to know exactly how the price is built up
Frequently asked questions
Question: Why three steps (surcharge, group, category)?
- This seems complicated, but it makes the system very flexible
- You can create complex rule sets for different customers
- Once set up, it works automatically
Question: Can I have different surcharges for different customers?
- Yes! Create multiple surcharge categories
- Category A for retail customers (60% surcharge)
- Category B for wholesale customers (30% surcharge)
- Assign the correct category to each customer
Question: What if I make a mistake?
- You can adjust everything afterwards
- Change the surcharge, group or category
- Reload if needed (see step 4)
- The new prices will be applied
Question: Are existing invoices adjusted?
- No, only new orders get the new surcharges
- Old invoices stay as they were
- This protects your administration
Related guides
- Creating and setting up a new customer (debtor) — To assign surcharge categories to customers
- Creating and maintaining VAT rates — VAT settings that work together with surcharges
Summary
Setting up surcharges is done in three main steps:
- Step 1 - Surcharge: Create the surcharge (percentage, fixed amount or container) with a name and percentage/amount
- Step 2 - Surcharge group: Put the surcharge in a group and add surcharge rules (with optional filters for article groups)
- Step 3 - Surcharge category: Create a category with the surcharge group and determine if it should be visible on invoices
- Extra - Reload: Reload surcharges if they are processed in prices, use rounding for neat final prices (for example always on 9 cents)
- Why useful: Automatic profit margins, different prices per customer type, no more manual calculations
Do you have questions or need help? Feel free to contact us by phone at +31 (0)71 30 20 310 or send an email to support@easyflor.nl.