- Adding photos to articles
- Adjusting article names and sales units
- Automatically overwriting article names
- Charging trolleys
- Creating and organizing article groups
- Creating and using bouquets
- Creating and using label groups
- Creating sales barcodes
- Importing FloraHolland container price list
- Using your own VBN codes
Adding photos to articles
Adding photos to articles
Introduction: What is adding photos to articles?
Adding photos to articles means putting your own product photos in the system. These photos are then shown on your webshop, in orders and in your stock.
Why add your own photos?
You want to use your own photos because:
- The grower's photos are sometimes not nice or clear enough
- You can take better photos of your products yourself
- You want customers to see how the product looks at your place
- You can set one good photo that is automatically used for future orders of the same product
- Your webshop looks more professional with your own, nice photos
How do you add photos to articles?
There are three ways to add photos. Choose the method that best fits your situation.
Method 1: Add photo at article level (recommended)
This is the best way. The photo is linked to the specific article and applies from the next time you purchase this product.
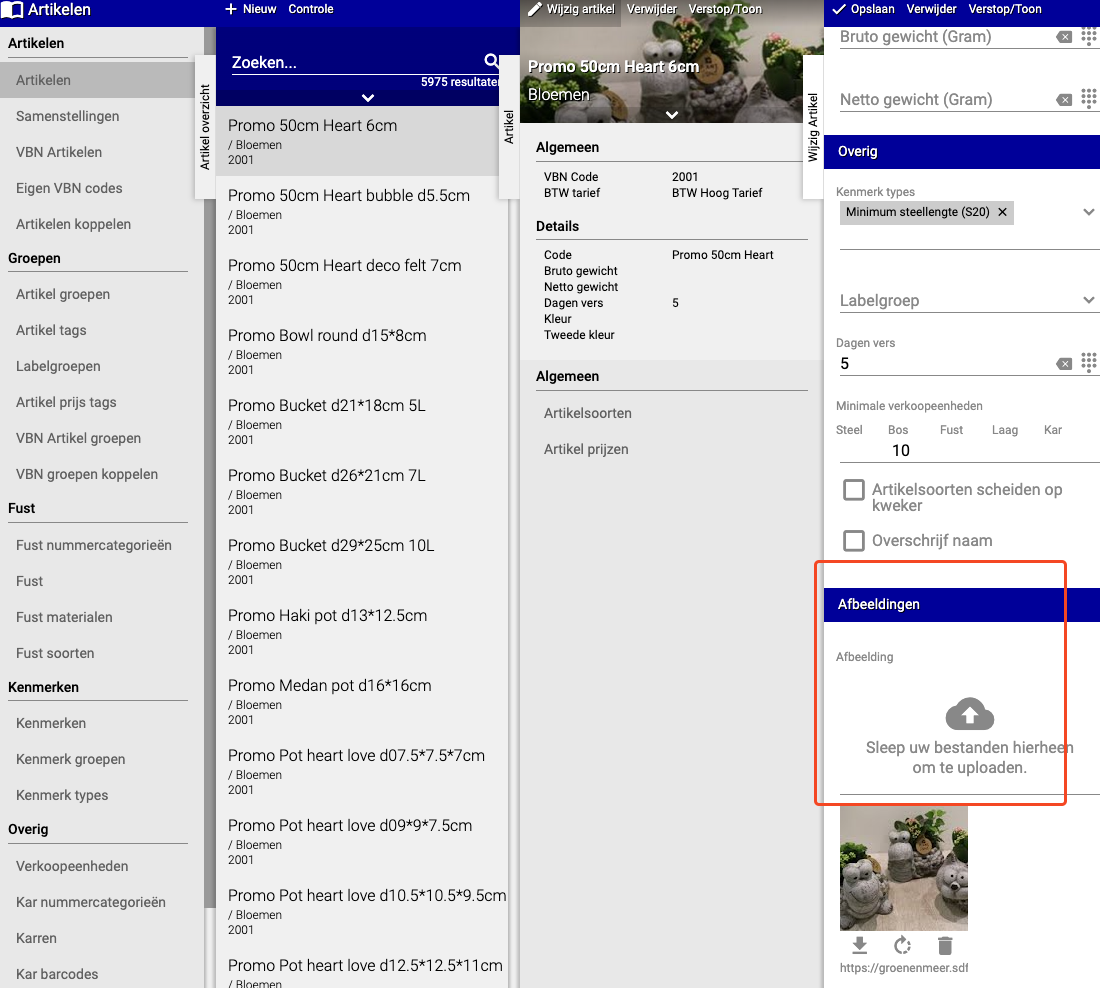
Step 1: Go to the article
- Go to "Articles"
- Click on "(Articles) Articles"
- Search and select the article you want to add a photo to
- Click "Edit article"
- Click "Images"
Step 2: Upload photo
- Click the button to add a photo (usually an upload button or plus icon)
- Choose the photo from your computer
- Click "Save"
Note: This photo is used from the next time you purchase this product. Products you already have in stock don't automatically get this photo.
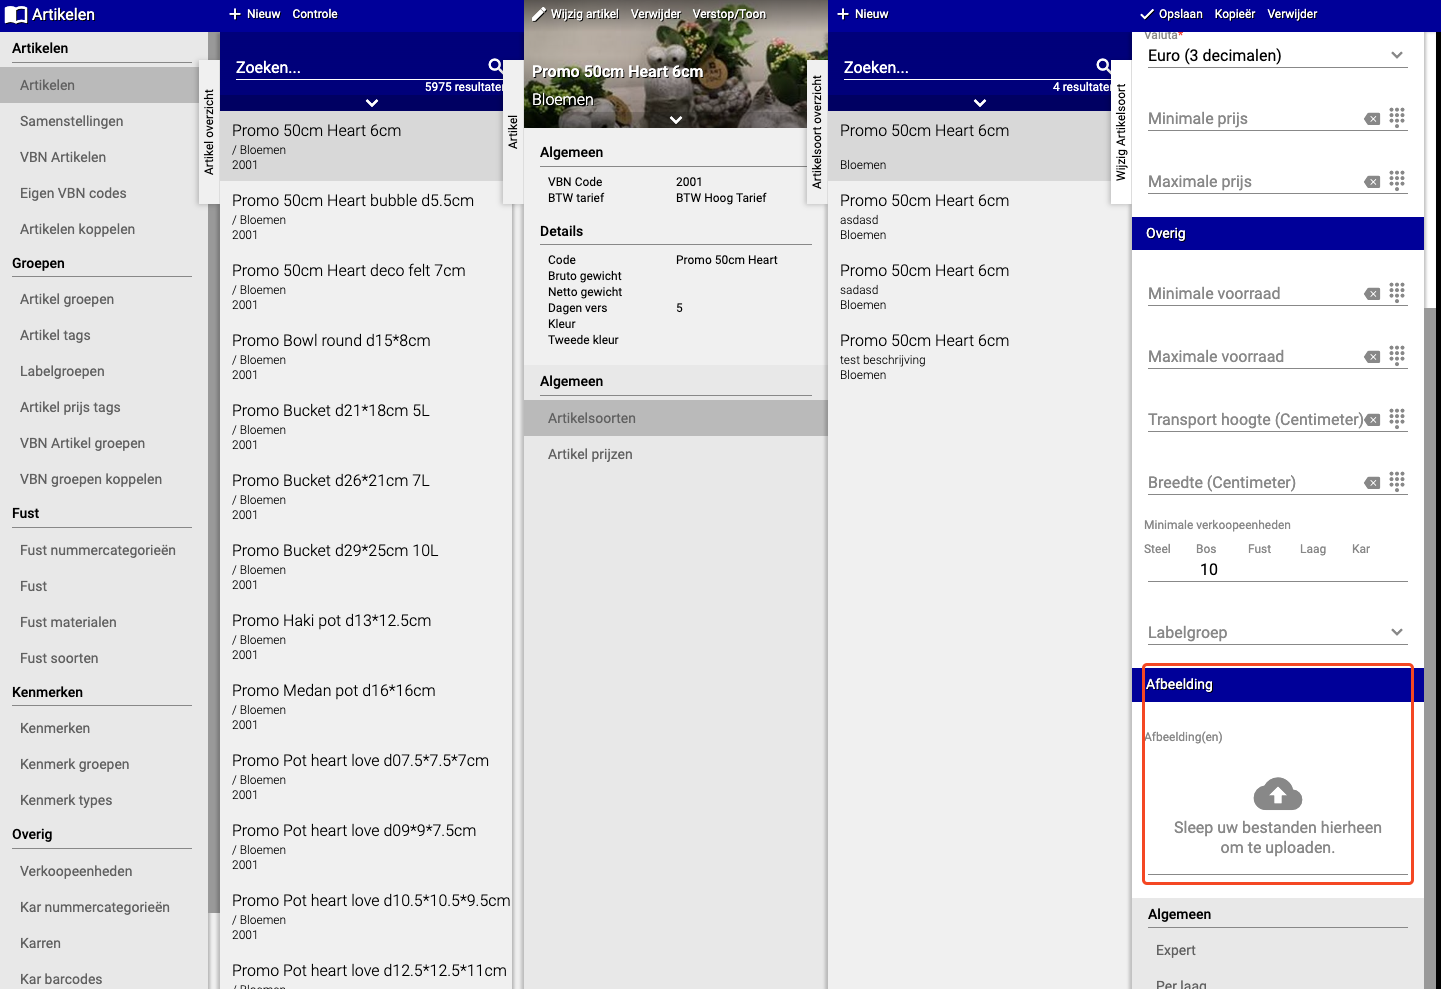
Method 2: Add photo at article type level
This method is similar to method 1, but at a higher level (article type instead of article).
Step 1: Go to the article type
- Go to "Articles"
- Click on "Article types"
- Search and select the article type you want to add a photo to
- Click "Image"
Step 2: Upload photo
- Click the button to add a photo
- Choose the photo from your computer
- Click "Save"
Method 3: Add photo during check-in
This method is useful when you've just received products and want to add a photo immediately.
Step 1: During check-in
- Go to "Check in"
- Select the product you want to check in
- You now see an option to add a photo
Step 2: Upload photo and set options
- Click the button to add a photo
- Choose the photo from your computer
- You now get two options:
- Only for this batch: The photo is only used for the products you're checking in now
- Also for future batches: The photo is set as default and is automatically used for all future orders of this product
- Choose the option you want
- Click "Save" or "Apply"
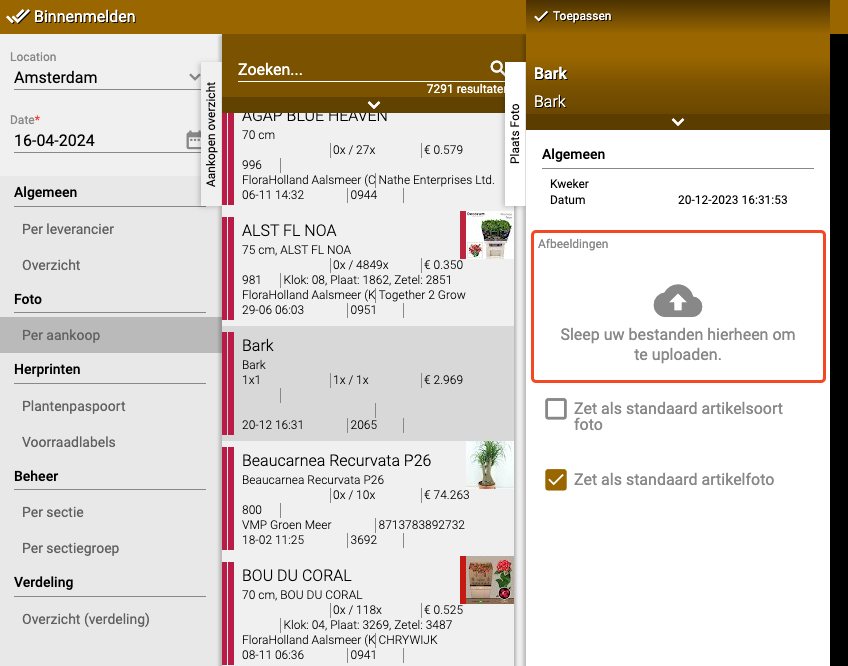
Tip: If you often purchase the same products, choose "Also for future batches". Then you don't have to upload the same photo each time.
Which method should I choose?
Use Method 1 (article level) if:
- You want to set a default photo for a product
- You want to use the photo for all future orders
- You want to save time by not uploading the same photo each time
Use Method 2 (article type level) if:
- You want to set a photo for an entire category of products
- You work with article types instead of individual articles
Use Method 3 (during check-in) if:
- You've just received products and want to take a photo immediately
- You want to work quickly and do everything at once
- You want to choose whether the photo applies only to this batch or also to future batches
Summary
You can add photos to articles in three ways:
- Via the article itself (best option for default photos)
- Via the article type (for entire categories)
- During check-in (quick and direct, with option for future use)
Do you have questions or need help? Feel free to contact us by phone at +31 (0)71 30 20 310 or send an email to support@easyflor.nl.