- Adding photos to articles
- Adjusting article names and sales units
- Automatically overwriting article names
- Charging trolleys
- Creating and organizing article groups
- Creating and using bouquets
- Creating and using label groups
- Creating sales barcodes
- Importing FloraHolland container price list
- Using your own VBN codes
Charging trolleys
Automatically charging trolleys on invoices
Introduction: What is charging trolleys?
Charging trolleys means automatically putting the costs of transport trolleys (roll containers) on customer invoices. This can be costs for the trolley itself, but also deposit (security you get back when you return the trolley).
Why charge trolleys?
You want to charge trolleys because:
- You can automatically charge transport costs to customers
- You can ask for deposit (security) for trolleys customers borrow
- You don't have to manually remember which trolley went to which customer
- Customers see exactly what they pay for transport
- You can vary costs per distance or area
What can you charge?
- Deposit: Security you get back when the trolley is returned
- Costs: The actual price for using the trolley
For which parts?
- The trolley itself
- Extensions (extra parts on the trolley)
- Plates (base plates or shelves)
How do you charge trolleys?
Step 1: Create a trolley (preparation)
Before you can charge, the trolley must first be in the system. Follow this guide:
Step 2: Choose how you want to charge
You have two options: a fixed price for all customers, or different prices per area. Choose the method that fits your company.
Option A: Always charge the same price (simple)
Use this option if every customer pays the same price for a trolley, regardless of where they live.
Step 1: Go to trolley settings
- Go to "Articles"
- Click on "Trolleys"
- Click on the trolley you want to set prices for
- Click "Edit"
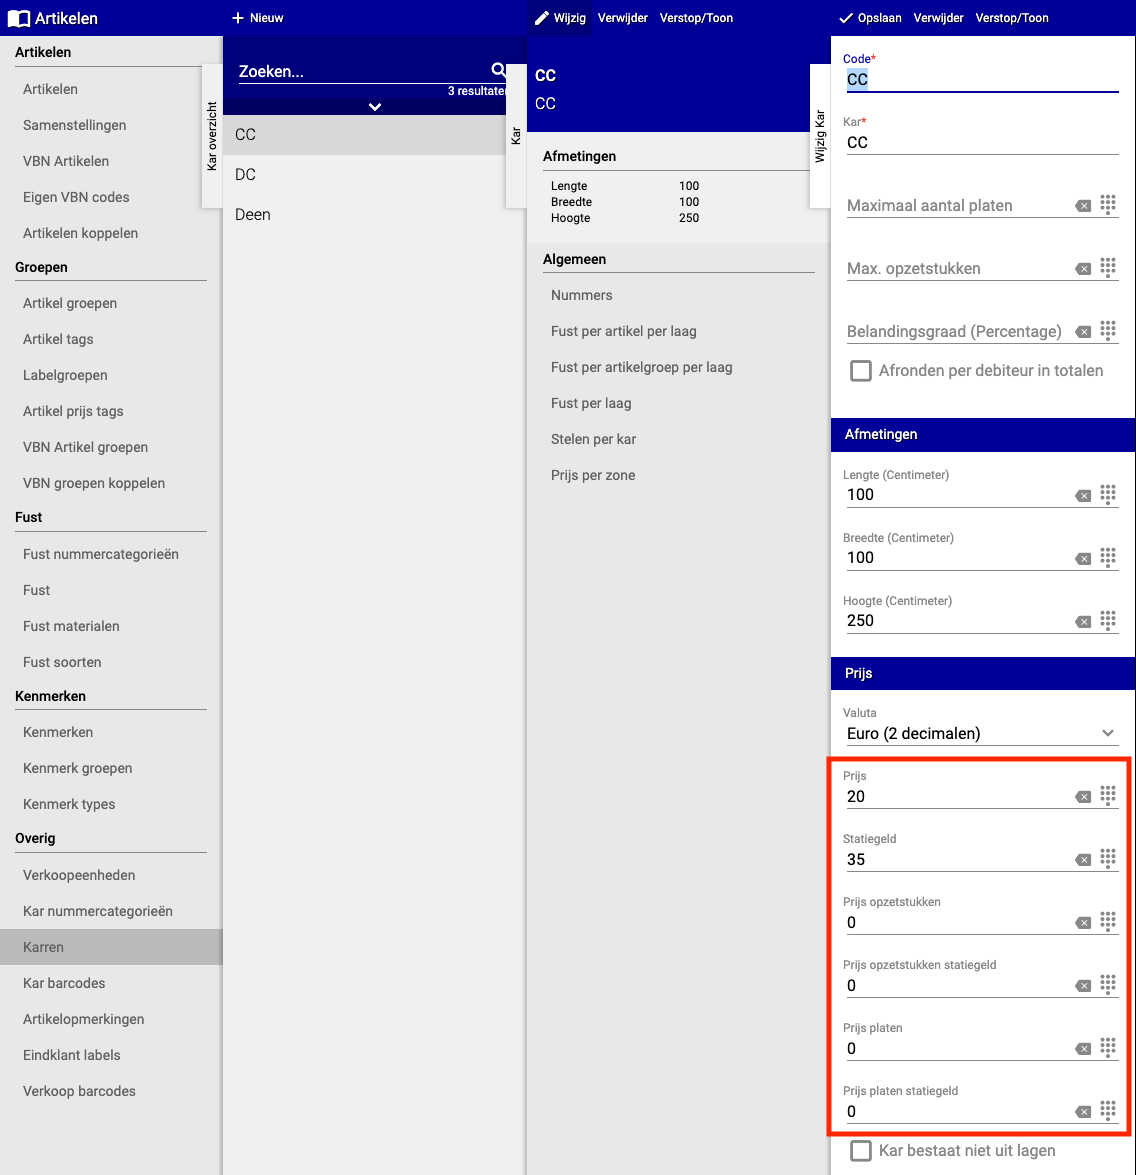
Step 2: Fill in prices
- You now see a section with different prices
- Fill in the amounts you want to charge customers
- Examples:
- CC transport: 75 euros
- DC transport: 50 euros
- Click "Save"
Done! From now on this fixed price is automatically charged to all customers.
Option B: Different prices per transport area (advanced)
Use this option if you want to charge different prices depending on where the customer lives (e.g., nearby = cheaper, far away = more expensive).
What are zones and transport areas?
- Zone: An area where the same price applies (e.g., "Zone North" costs 50 euros)
- Transport area: A specific part of a zone (e.g., postal code 1000-2000)
Preparation: Create transport areas and carriers Before you can use this, you must first create transport areas and carriers:
- Create transport areas: https://support.easyflor.nl/Home/Article/1924
- Create carriers: https://support.easyflor.nl/Home/Article/79
Step 1: Set prices per zone
- Go to "Articles"
- Click on "Trolleys"
- Choose the trolley you want to set prices for
- Click on "Price per zone"
- Click "New"
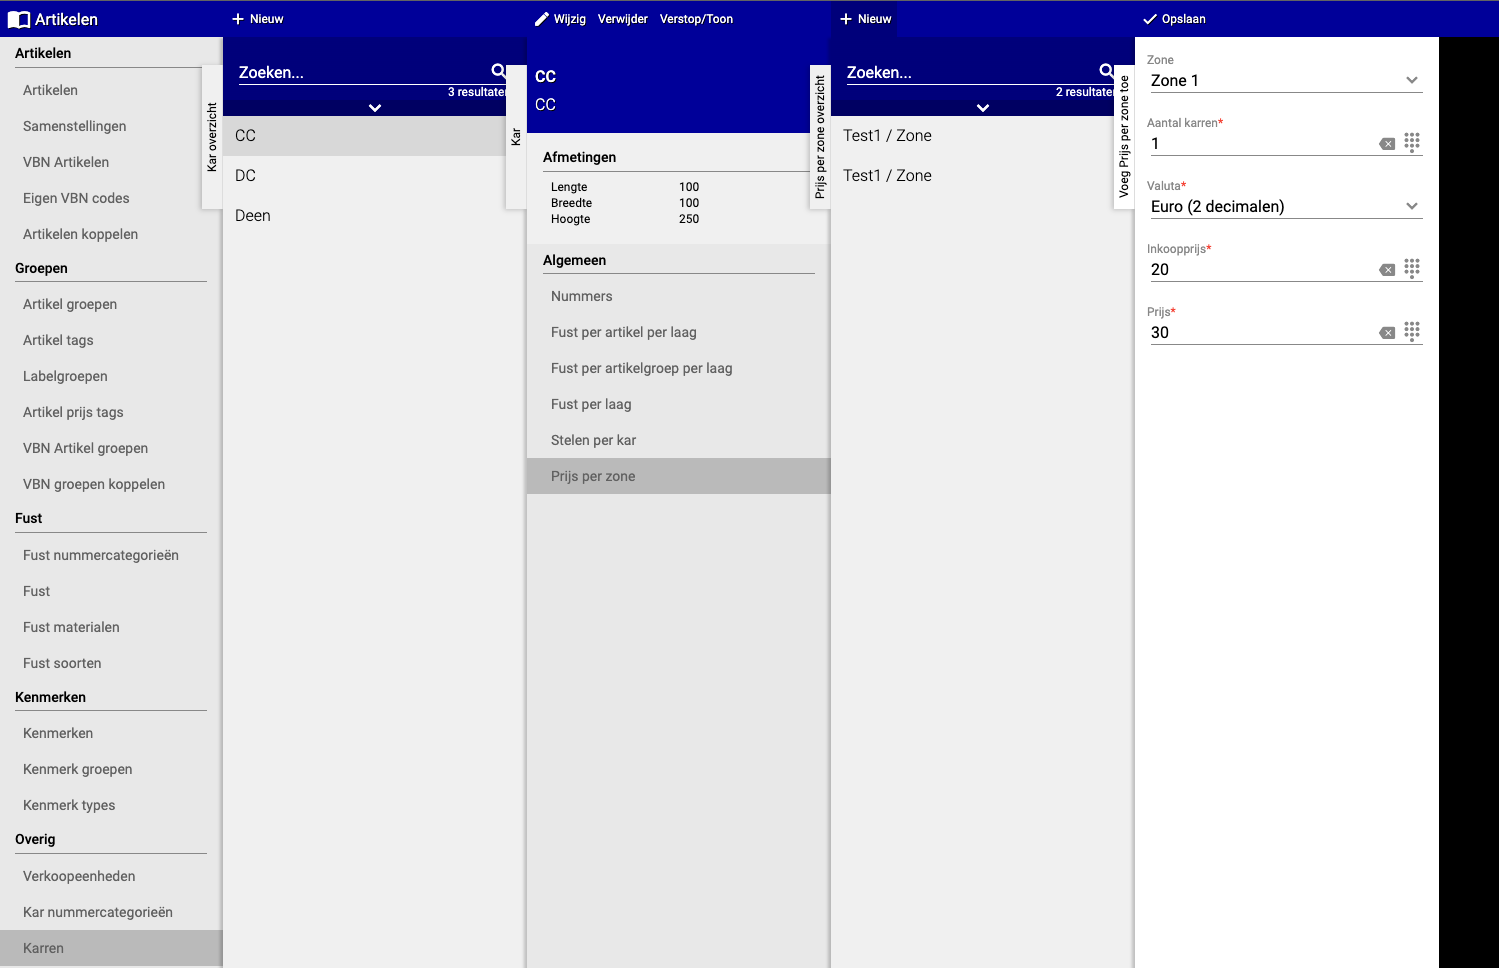
Step 2: Fill in zone and price
- Choose the zone (e.g., "Zone North")
- Fill in the price you want to charge for this zone
- Repeat this for each zone
- Click "Save"
Extra option: Deposit per zone Want to also set deposit (security) per zone? That's also possible in this screen.
Step 3: Turn on charging for customers
Now that prices are set, you still need to indicate per customer that they should get trolley costs on their invoice.
Step 1: Go to customer settings
- Go to "Organization"
- Click on "Debtors"
- Search and select the customer
- Click "Configuration"
- Click "Distribution"
- Click "Settings"
Step 2: Turn on trolley charging
- Find the option "Invoice trolleys"
- Check this box
- Click "Save"

Extra options (optional): You can also choose NOT to charge certain things:
- Don't charge trolley price: Customer doesn't pay transport costs, but does pay deposit
- Don't charge trolley deposit: Customer pays transport costs, but no deposit (security)
Check the desired options and click "Save".
Step 4: Done!
Trolleys are now automatically charged on customer invoices according to the settings you chose.
Summary
Charging trolleys is done in three steps:
- First create the trolley in the system
- Set prices: fixed price for everyone, or different prices per area/zone
- Turn on trolley invoicing for each customer
Do you have questions or need help? Feel free to contact us by phone at +31 (0)71 30 20 310 or send an email to support@easyflor.nl.