- (VIDEO) Creating administration and location
- (VIDEO) Creating debtors
- (VIDEO) Creating shop users
- Assigning Seat and Place Numbers (Via EKT)
- Automatic redistribution from location to location to debtor upon sale
- Creating a Shop User (Webshop)
- Creating and setting up a new customer (debtor)
- Creating contact persons
- Creating Sub Shop Users
- Creating VMP for debtors
- How to Create a Purchase Debtor in Easyflor
- Link Debtors to Employees
- Order Days
- Setting up administration and location
- Setting up cancellation time
- Setting Up Invoice Numbers
Creating and setting up a new customer (debtor)
How do you create a debtor in Easyflor?
What is a debtor?
A debtor is a customer who buys from you and later pays an invoice. In Easyflor, you create a debtor for each customer so you can process orders and send invoices.
Why do you need to create a debtor?
- Without a debtor, you cannot create orders for a customer
- You need it to be able to send invoices
- All important customer details are stored in one place
- You can set how the customer wants to receive their invoice
How do you create a debtor?
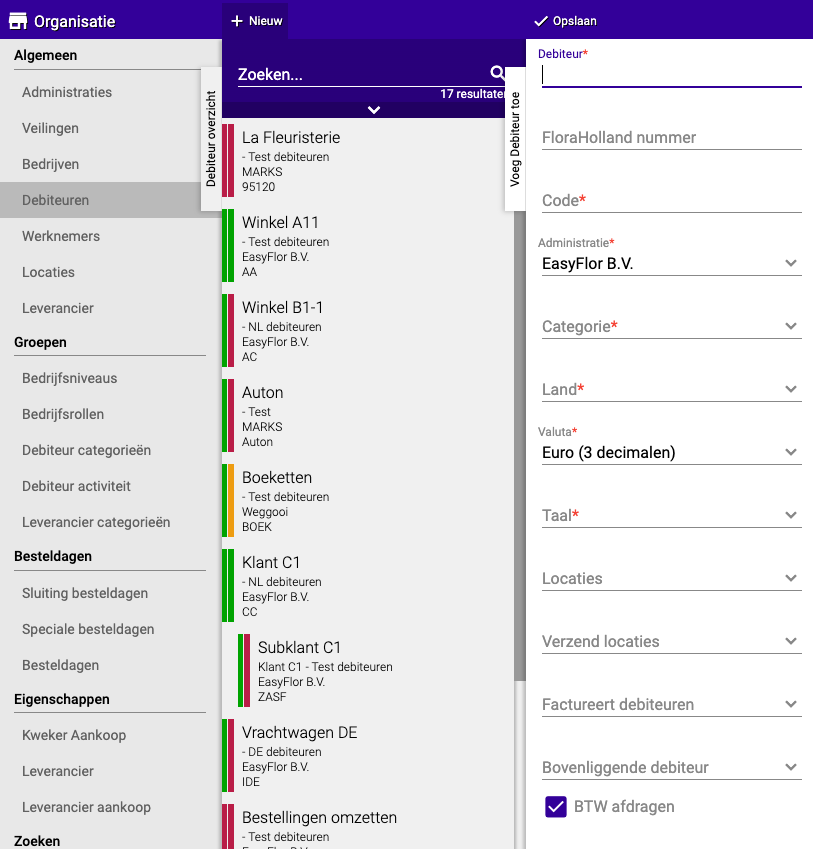
Step 1: Go to debtors
- Click on "Organisation" in the menu
- Click on "Debtors"
Step 2: Create a new debtor
Option A: Copy an existing debtor (easiest!)
- Have you previously created a debtor together with a consultant?
- Select that debtor
- Click the "Copy" button
- Click "Copy Debtor" again
- All settings will be automatically copied!
Option B: Create a completely new debtor
- Click on "+New"
Step 3: Fill in the basic details
Fill in the following:
- Debtor: The full name of the customer
- FloraHolland number: Enter the number if the customer has one
- Code: A short version of the name (for example, for labels)
- Administration: Choose which administration the invoice should fall under
- Category: Leave this set to "Debtors"
- Country and Language: This determines in which language the invoice will be created
- Currency: Set this to Euro
- Location: (If you have multiple locations) Choose the location the customer belongs to, or leave empty
- Parent debtor: Choose the same location as above
- Click "Apply"
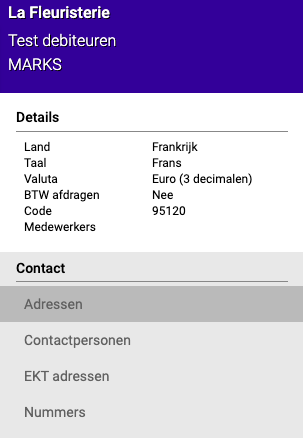
Step 4: Add contact details
Select the debtor you just created and click on "Contact".
Addresses:
- Here you can fill in addresses if you want to be able to see them
Contact persons:
- Click on "+New"
- Fill in at least a surname
- Choose what you want to use the contact for (for example "Invoice" and/or "Order")
- Select the contact
- At "Email addresses": fill in the email address where the invoice should be sent
- You can add multiple contact persons and email addresses
EKT addresses and numbers:
- Only fill this in if the debtor has an EKT address or VAT number that you want to use
Step 5: Additional settings (only if you did NOT copy)
If you copied a debtor, you're done now! If you didn't copy, complete these additional steps:
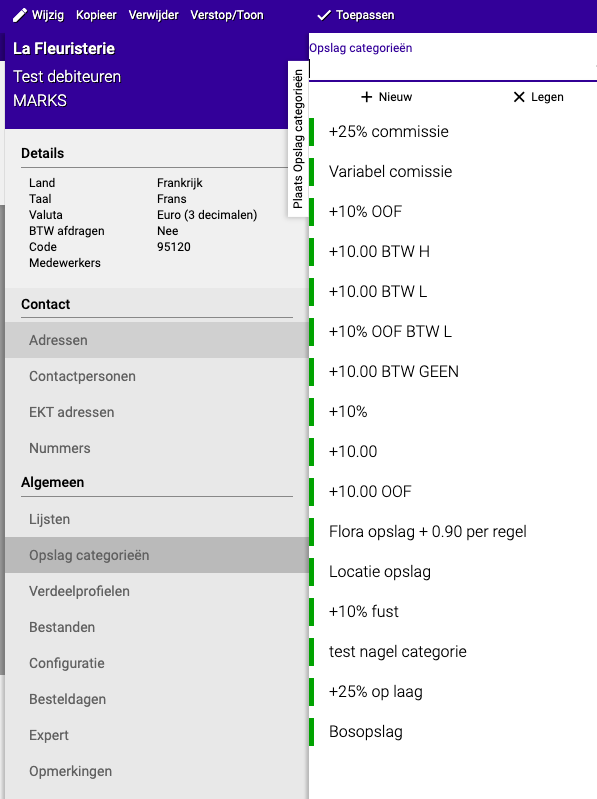
Surcharge category:
- Enter a surcharge category if this is needed
- More information about surcharges can be found in the guide: Creating surcharges
Configuration - Invoice:
- Go to "Configuration" → "Invoice"
- Want to send the invoice by email?
- Set at "Other" → "To do" → "Email"
- Want to also include an Excel file?
- Select this under "Settings"

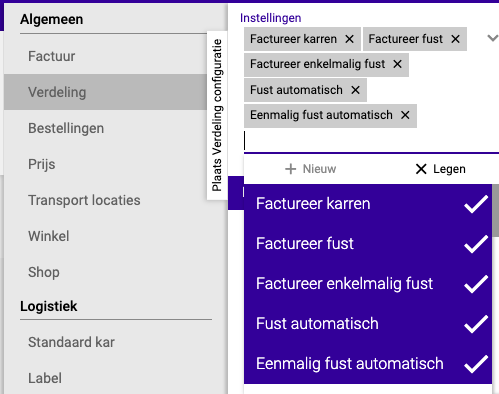
Configuration - Distribution:
If containers or carts need to appear on the invoice:
- Check: "Container automatic"
- Check: "One-time container automatic"
- Check: "Invoice container"
- Check: "Invoice one-time container"
- Check: "Invoice cart"
- Choose the correct VAT rates for containers (or leave empty)
Want to use an EKT number?
- Go to "Organisation" → "Debtors" → [Choose your debtor] → "Configuration" → "Distribution"
- Under "Settings", check: "Use EKT"
- You can set it to be sent automatically
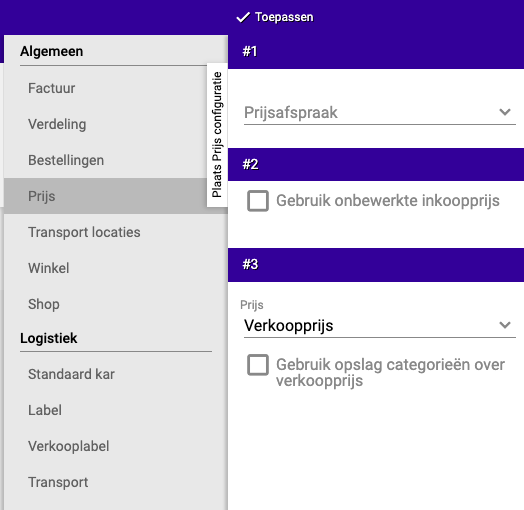
Configuration - Price:
- Select a price agreement if you have one
- Want to use the purchase price? Check this option
- Select which price you want to use
- Should the surcharge category be calculated on the selling price? Check this option
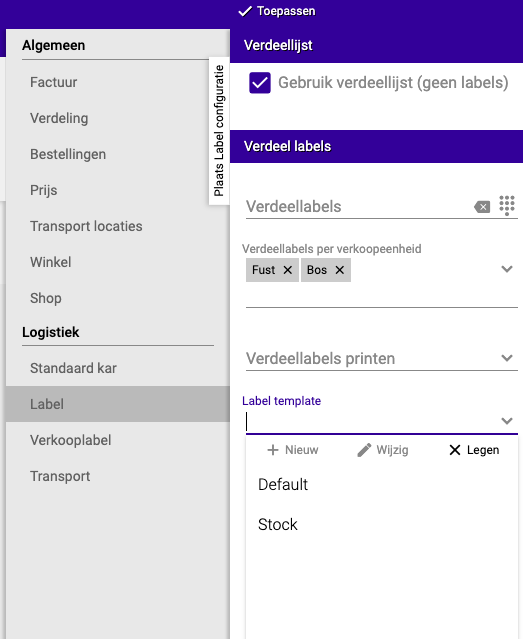
Configuration - Label:
- Want to print labels? Choose whether it should be per unit, container, or batch
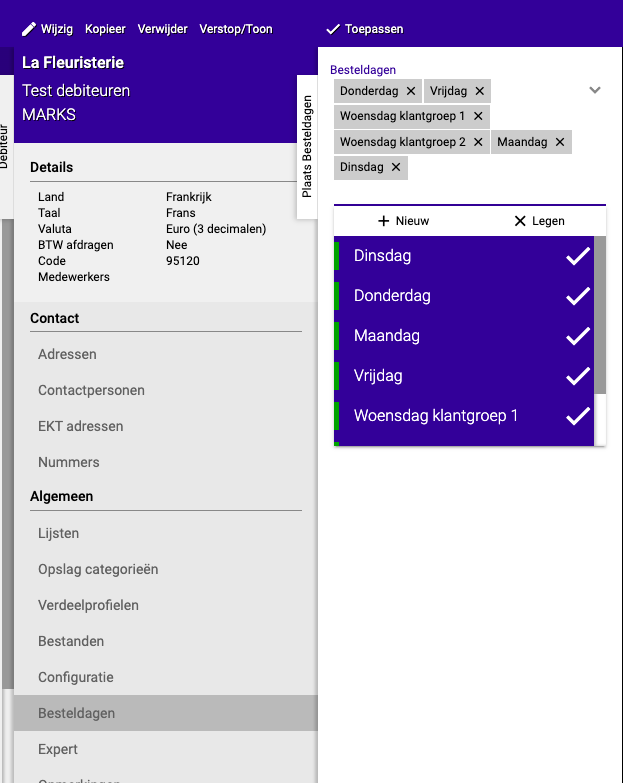
Order days:
- Fill in all days of the week (you can adjust this later)
- More information about order days and how they work can be found in the guide: Setting up order days
Unblocking a customer
If a customer is blocked and needs to regain access:
- Search for the relevant customer
- Go to "Expert" in the menu
- Click the "Block" button to unblock the customer
- The customer will turn green and can place orders and receive invoices again
Adjusting debtor options
Each debtor has a number of extra options that you can adjust. You can find these via Organisation → Debtors → select the debtor → click "Edit". At the bottom of the screen you will find a dropdown called "Options". Here you can configure whether a debtor is visible in the distribution, or should be hidden from certain parts of the system.
Done!
You have now successfully created a debtor in Easyflor. You can now create orders and send invoices to this customer.
Would you also like to give this customer access to the webshop? See the guide: Creating a shop user
Need extra help? There is also a video available that shows all the steps. Click here to watch the video.
Do you have questions or need help? Feel free to contact us by phone at +31 (0)71 30 20 310 or send an email to support@easyflor.nl.